
TrialPad includes powerful annotation tools designed for live presentation. Mark up exhibits instantly to direct attention and clarify key evidence.
The Annotation Palette
The annotation palette holds all your markup tools in one place, and you can position it wherever it works best for you.
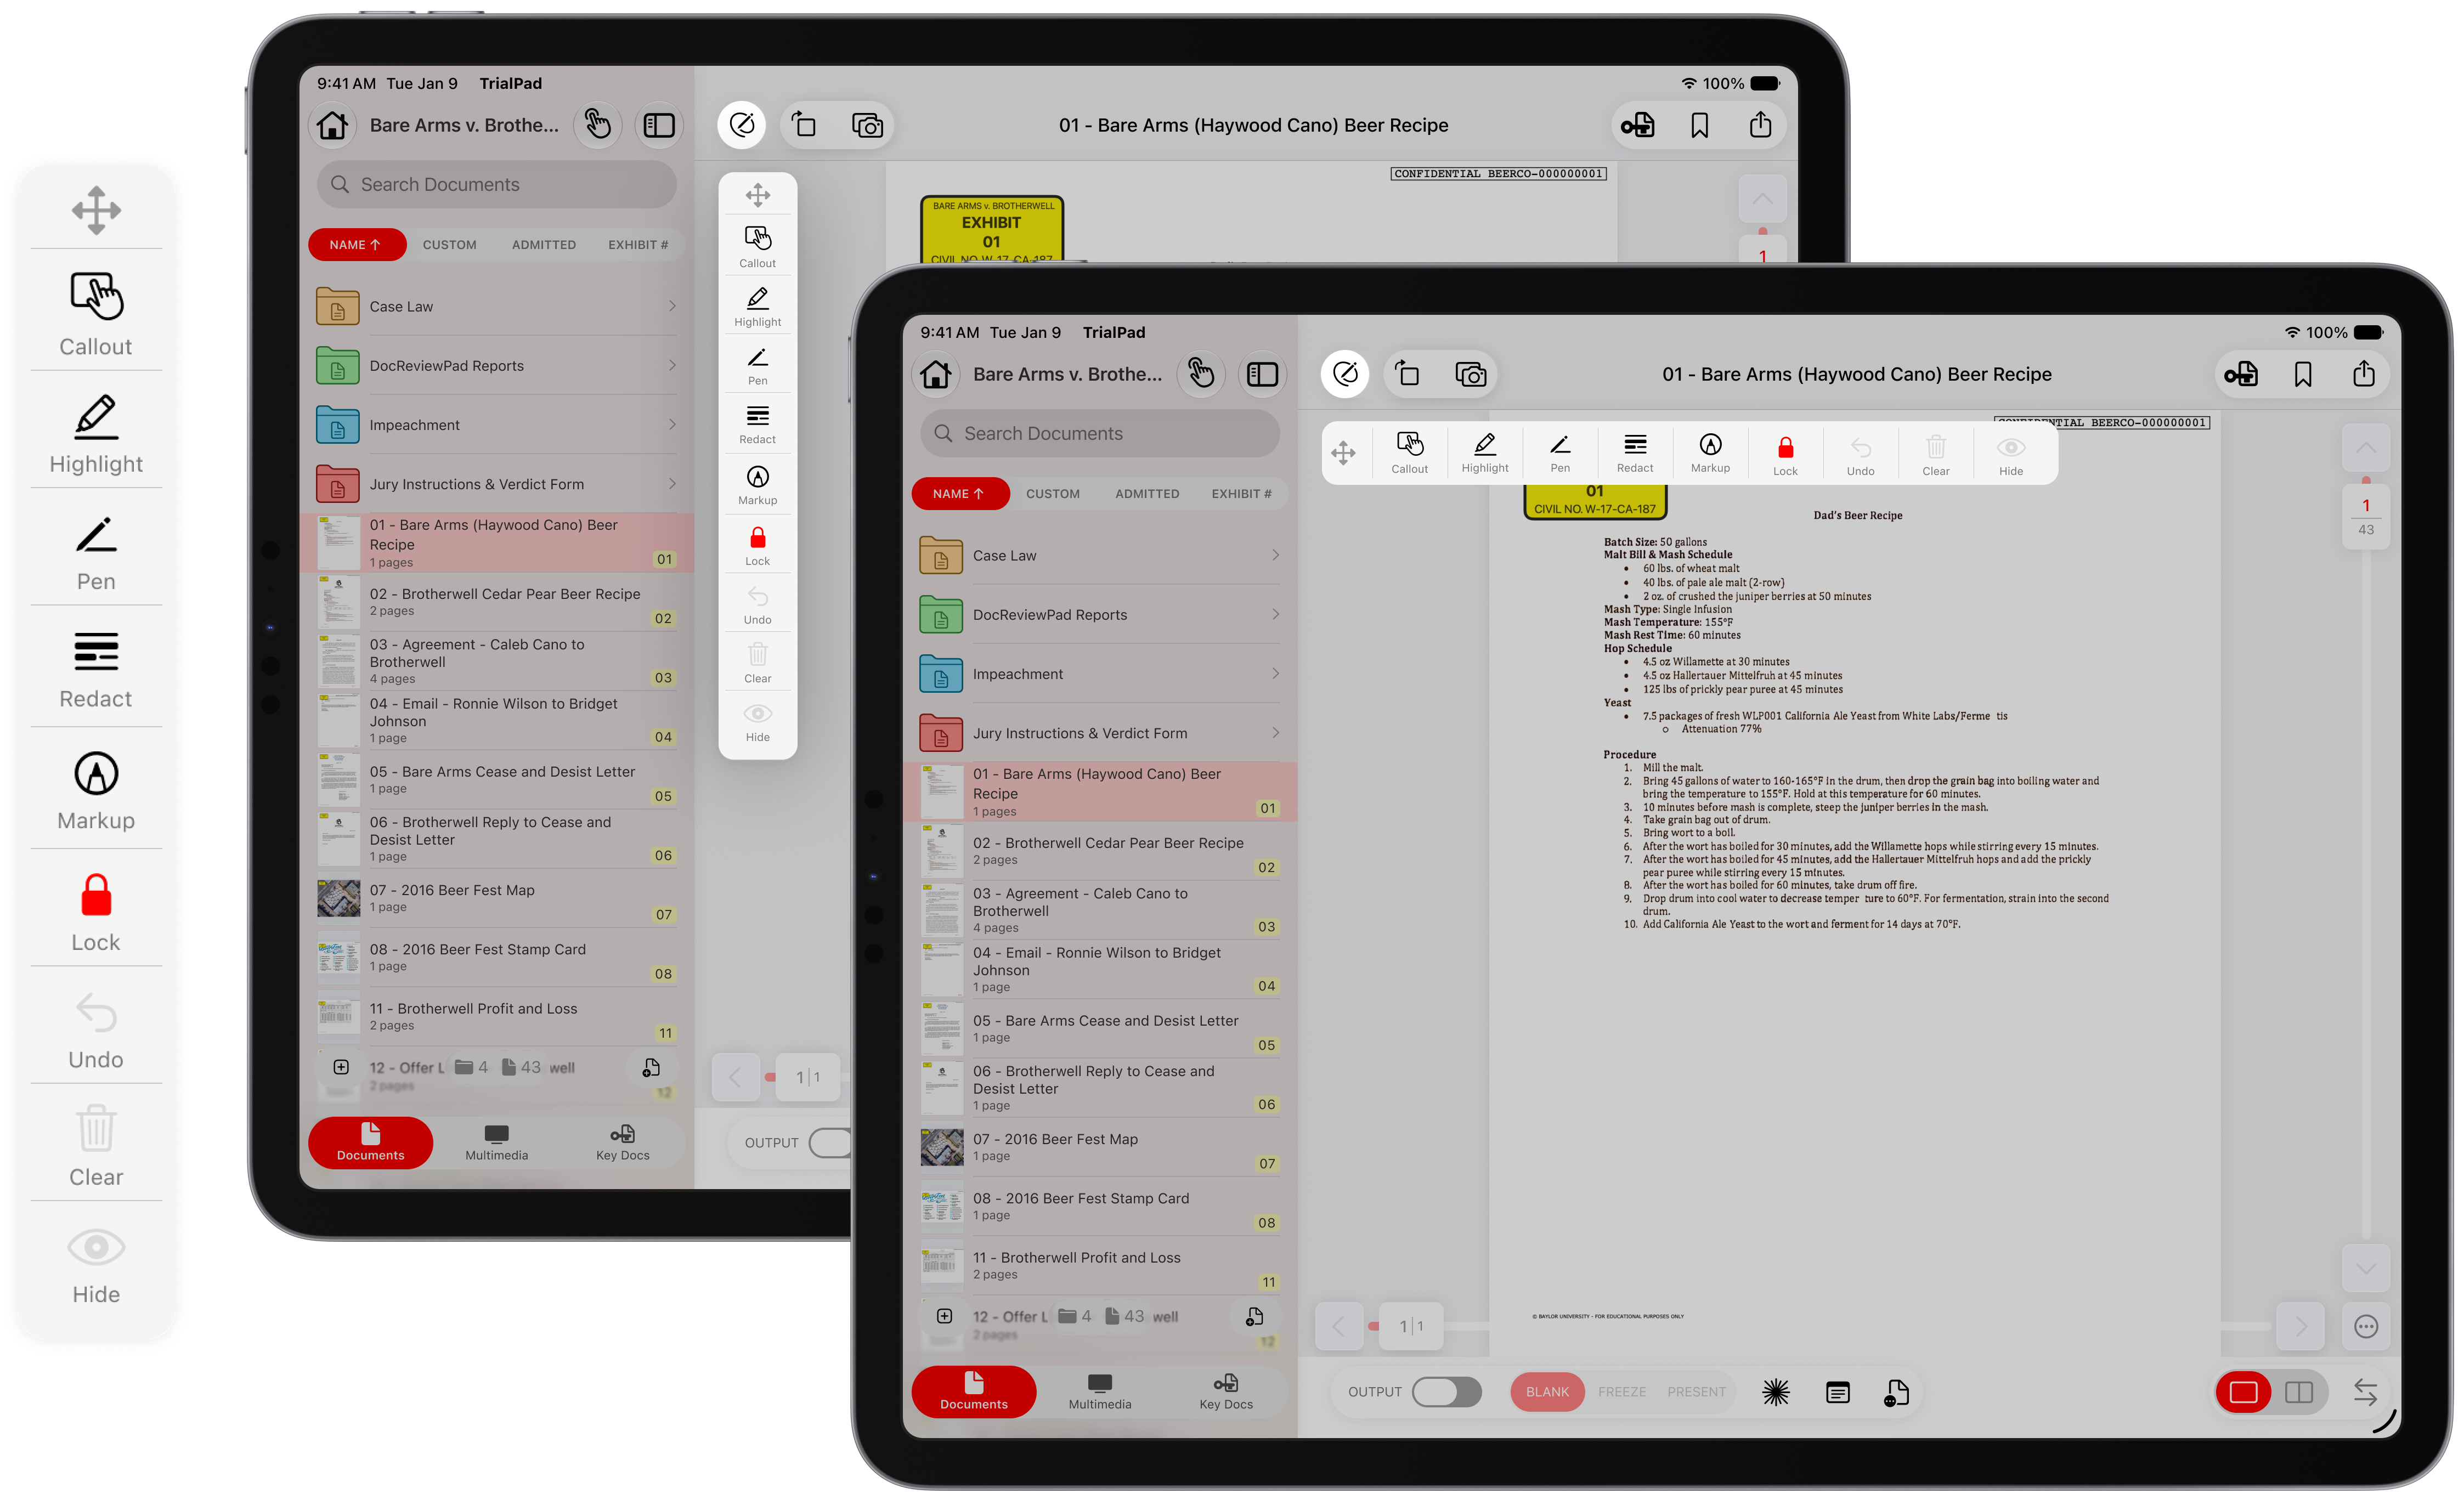
How to Open the Annotation Palette
Tap the Annotation button on the navigation toolbar to view the palette.
Tap any tool in the palette to select it, then mark up the document.
How to Change the Palette Layout
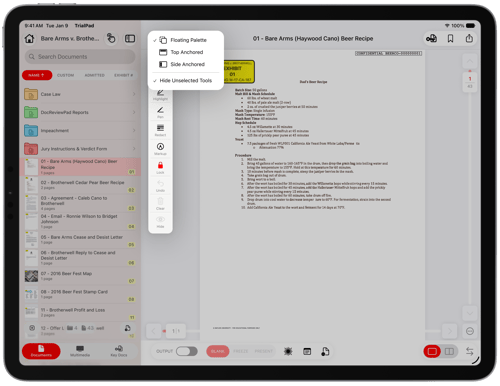
Long-press the Annotation button on the navigation toolbar.
Choose a layout: Floating Palette, Top Anchored, Side Anchored, or Hide Unselected Tools.
Choose Floating Palette if you want to reposition the palette freely — tap and drag the Move handle at the top of the palette to place it anywhere on screen.
Annotation Tools
To save annotations, save the document as a Key Doc. Saved annotations are stored in the Key Docs tab. For more information, please see Organizing with Key Docs in our Help Center.
Callout Tool (Outline: None, Red, Blue, Green, or Black)
Create focused enlargements of important areas.
Example: Callout horizontally for text or vertically for spreadsheet columns.
Using Callouts:
Select a callout border color, then drag from the top-left corner to the bottom-right corner of the area you want to emphasize.
- A gray guide box appears as you drag to help position the callout.
- Automatically fill the horizontal or vertical space on your external display.
- Create multiple callouts and move them as needed (up to 5 per pane).
- Tap a callout to quickly change its border color.
- Pinch a callout to resize it.
Dimming the Background: Long-press a callout to open its settings, then choose a Dim Background level — 25%, 50%, or 75% — to fade the rest of the document and keep focus on the callout. Turn dimming off if you'd rather leave the full page visible.
Callouts in Split View: When presenting two documents side by side, long-press a callout and turn on Span to stretch it across both panes. Leave Span off to keep the callout confined to the side where it was created.
Highlight Tool (Yellow, Lime, Cyan, Magenta)
Emphasize critical testimony, medical findings, or insurance language.
Example: In a personal injury case, you might highlight important treatment dates.
Pen Tool (Red, Blue, Green, Black)
Underline or circle key phrases directly on the document.
Example: Draw attention to a surgeon’s operative note indicating a deviation from standard care.
Redact Tool (Black, White)
Hide sensitive content, but redactions are reversible until exported. Save as Use Key Docs to save your redactions for presenting. Use DocReviewPad to permanently redact.
Example: Redact patient identifiers and social security numbers.
Markup Tool (iPad only)
Use Apple Pencil, a stylus, or your finger to draw freely on the screen.
Example: When using the Whiteboard, use MarkUps to take notes or create demonstratives.
Managing Annotations
Use these controls, found at the bottom of the annotation palette, to manage your tools and markup.
Lock: Keep the selected tool active after each use, instead of it deselecting automatically. Tap Lock to pin the current tool, and tap it again to release it. You can also choose to Keep annotation tool active from Settings > Document Preferences to lock tools by default.
Undo: Remove the last annotation. If you're using a keyboard, press Command–Z to undo annotations one at a time.
Clear: Remove all annotations from the current page at once. You will be able to select which annotations you want to clear.
Hide: Temporarily hide all annotations on the page without deleting them. Choose to Hide on Device Only or Hide on Device & Output. Tap Hide again to bring them back.